Posts

Basic Website

Image
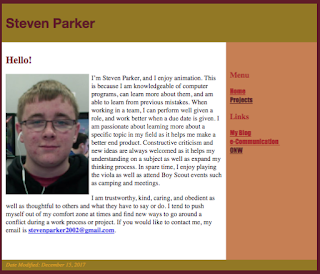
Dreamweaver On this project, I was assigned to create a website as a final grade for the semester. To do this I used an application called Adobe Dreamweaver. This is essentially a program that enables you to create your own website layout or design, and it could even teach a bit about coding. When starting, I was given a couple of layout files to use for the project, so all that I needed to do was import them from the server folder I have. After this was done, I took a picture of myself and brought it into the layout. Right after this step has been completed, it was time to add in my "Elevator Pitch" by simply pasting it from the drive I kept it in. The projects page was essentially the same thing, taking text from other areas I made, and embedding my videos form YouTube. Now, the finer details, colors were selected by heading into the properties section on the right hand side, and by choosing what to color, you can determine the shade it will turn out to be. Links were ...

Challenge #3, Chase Scene

Image
Pre-Production When developing ideas for the group, it had eventually boiled down to three items, a hall monitor evasion, museum chase, and a school item theft. Each of these were rather unique in their own plan, for instance, the museum chase had a guard and "special item." The hall monitor evasion had some comedy and suspense as well as backtracking. Finally, our school item theft sequence required a thief and student chasing after. Our main conflict when presenting these to each other was who would be what, and how would the theme we want fit in.  Scouting out our Locations When we developed our story, it was time to figure out where to shoot and how many shots there would be. So it started with a basic path to follow, a pod, to a main hallway, commons, another hall, to the stairs, and capture. Once agreed upon, angles and shot sizes were put into order, as well as a clearer sequence. At this time, basic shot locations were determined through our storyline, th...

e9 AB Sequence

Image
Basic AB Sequencing To start off, we needed to get our shot sizes, and make a variety of cuts to make our film faster-paced or intriguing. I decided to think of each of the six shot sizes and what would pair best with our ideas, and later shared them throughout our group and assignment. After that was decided, it was time to determine what sequence would go where, and how we would follow the 180 degree rule. The sequence of events is shown in the video, and how we trie to keep an organized video is through the camera location. We also added in an obstacle, in this case an acting hall monitor, to give an element of sudden suspense.  From Planning to Filming In the beginning of this project, our group originally had a completely different idea involving a hall monitor, but it started to become a chase scene instead of the assigned AB sequenced video. So when we ran through a new idea, it came to life only when we pressed the record button. We knew we wanted our obstacle or...

"How to Print a Document"

Image
The Process... When my group and I were given the assignment to shoot a video over printing a document, we immediately started thinking of the shot angle and size as well as the locations. Soon we had created a Google Doc, and worked out the format of the story as well as the location that the shots are going to be located.  The biggest of our decisions were sorted out by conveying, as well as editing, them into docs and thinking about each through the aspect of our project location and angle. Once all of the gears were in place, we checked out equipment and went into the library for pictures of the anticipated shooting areas. We had a team member go into each shot to give a visual of the action and view that would be seen by the viewer. We slowly after that worked into what we thought we did best or would be best for the group. I was focused on camera location and the way the outcome of the video looked after every take. I was also sure that everybody agreed on the product ...

Careers That Interest Me

Career Cruising Through the website Career Cruising, I was able to take a matchmaker essentially based off of what I enjoyed or didn't necessarily like. After that to show some improved matching, I took an assessment over my set of skills that I believed I could do or not do so well. This gave me a grading from previous results on how much I matched up to them. The top 5 that were matched to me from the system are interior designer, graphic designer, animator, cartoonist, and artist. What are Each of these Careers? Let's begin with the the to one, interior designer, and their role is to design functional spaces indoors for homes and commercial buildings as well as making sure that they are comfortable. Graphic designers are to convey a company's or their own thoughts and ideas into a communicative form through things like logos, ads, and websites. Next, by definition, thins career makes or draws a series of images or drawing, then takes pictures of each one to c...

Google SketchUp

Image
New Experiences, and Brighter Beginnings Learning and using Google SketchUp Google SketchUp is an application that I never knew had existed until recently when the class was assigned to make a house from scratch. At first I was anxious at the thought of starting an unfamiliar program and process, but quickly learned. To explain, Google SketchUp is a 3-Dimensional program that is fun to use and easy to learn, especially when you get the tool shortcuts down. Despite it's few limitations on angles, it lets the user create whatever they can imagine.  Starting Off After mastering quick transitions between the various tools, it was finally time to figure out what model worked best with what I believed I cold do. To look for inspiration, the website, www.houseplans.com, gave a search engine providing what was needed. It was time to start work on the actual project, and it started with a rectangle following dimensions located from the house plans found from the website. Usin...

Placing a Mark In e-Communication

Image
Groups Working on Rough Drafts It was our first full week in a new school, different classes, and a 21st Century Academy called e-Communication. In our second hour e-Comm class, we were given the objective to create a flag or banner with symbols in it. My group's initial thought was to create a shield or box with four quadrants and put our symbols into it, one person per quadrant or section. So when we began working on our symbols and got to completing them, the class time was over and we packed up and headed out. Two days later now and we have the class again, and started to work on what we wanted as an overall group portfolio or piece. Eventually one of our group members mentioned the idea of the Earth as the background. After all of us had agreed upon the idea, we started thinking about what the continents would be with all of out symbols. Eventually we came to a final decision, and it was on the shape of our symbols compared to what the shape of the land on Earth looked...