Posts

Showing posts from October, 2018

Printing Processes and Techniques

Image
Relief Printing Relief printing was originally for hand pressing, rather than using an actual press. To do the process you would lay a piece of paper over a wood block, in which has an image with ink in cut sections. Beginning to make the block involves painting over it with a light black ink. After, you would lay a template down to draw the outline of the design desired. When carving the wood block itself, various white and black lines would be used to add or remove detail or additional texture to the image for when it transfers over to paper. After carving is completed, an ink roller goes over the block to prepare for pressing the paper. Linoleum cutting is similar to that of wood cutting, except removed material has a white finish, and anything that was left untouched remains black. Any tool that may remove the surface for either method will work for when you print, but blocks must be made backwards in terms of detailing to have a project that makes visual sense.  Intaglio

Multi-Exposure Panorama

Image
        When I had visited Washington D.C., it was with my school as a summer trip. I woke up at five in the morning and made my way to our schools, where we would travel to the airport to take off. When we landed It was a dizzying mess as we were trying to make our way through luggage and find the tour guide for the four day trip. As we completed this, we moved into a malls' food court to get with another school and become familiar with each other. From there, we traveled to our bus and went over some of the ground rules, such as always stay with the group.          Once we were on the road, the rest of the trip was fast-paced, with little to no stops in between our visits to the various museums, sights, and other memorials in Washington D.C. We began with the Lincoln Memorial, and viewed the area around whilst receiving a brief history lesson from our guide. After we were released we were to return at a set time, go to the bus, and move on to our next stop.  Again, this

Pop Art Project

Image
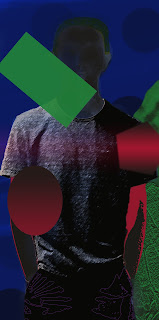
Making Something Pop To Start Things Off I was never a huge fan about pop culture, or art, but I received my inspiration for my creation from pop artist Andy Warhol, in a way. This is because I have contrasting colors, as well as various textures and a few shapes mixed in. To begin the project itself I had to have a subject to have a photo of other than myself, so I had a classmate fill the role for me. After uploading the picture to Photoshop, I got to work on separating body parts into layers and groups, and keeping the background within its own area.  Certain Parameters to Meet Although I had everything separated and easy to access, I didn't know what all I wanted to have, and if it would turn out to be alright. I had to have filters for layers, use different blending modes, and mask layers to get to my end-goal. I then decided to use the same filter for the skin (face and arms), and a similar filter for the clothing (shirt and shorts). After developing these aspects